
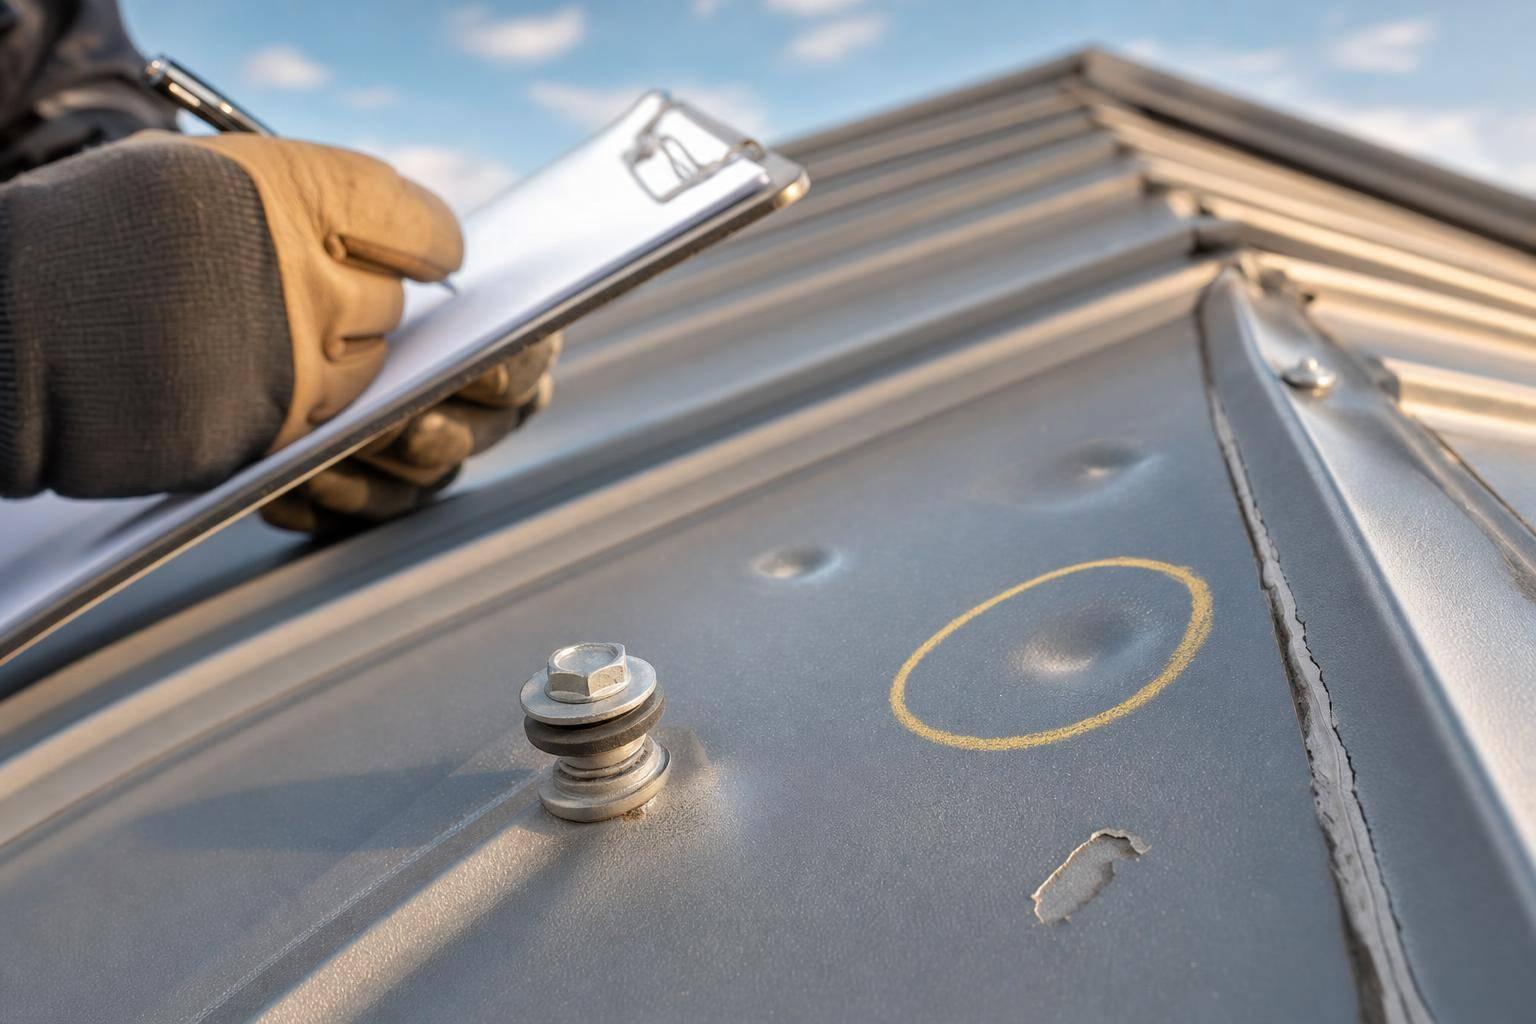
How to Inspect Metal Roofs for Storm Damage
If I inspect a metal roof after a storm, I start on the ground, check inside for leaks, and only get on the roof when it’s dry and safe. That simple order helps me spot wind damage, hail dents, loose fasteners, cracked sealant, flashing problems, and active leaks without taking extra risk.
I also try to inspect within 48–72 hours after the storm. That gives me a better chance to document damage for repairs or an insurance claim before rain, rust, or another wind event makes things worse. On metal roofs, even a small chip in the coating can turn into rust once bare metal gets wet.
Here’s the short version I’d follow:
- Wait for safe conditions: no rain, lightning, high winds, wet panels, or downed power lines
- Start from the ground: look for lifted edges, dents, bent trim, loose ridge caps, and gutter damage
- Check the attic and ceilings: watch for stains, damp insulation, musty smells, rust marks, and pinholes of daylight
- Inspect the roof surface last: look at panels, seams, fasteners, flashing, and sealant
- Document everything: take wide and close photos, use a coin or tape measure for scale, and note the date as 07/27/2026
- Know when to stop: if I see sagging, punctures, warped panels, or active leaks, I call a roofer
A few storm patterns matter most:
- Wind: often hits eaves, rakes, and ridge caps first
- Hail: can leave round dents, chipped coating, and sealant damage
- Rain: tends to show up at valleys, seams, flashing, and penetrations
| Damage type | What I look for | Main risk | Usual urgency |
|---|---|---|---|
| Wind | Lifted panels, loose trim, backed-out screws | Leaks and panel failure | High |
| Hail | Dents, coating chips, marks on vent caps | Rust and hidden damage | Moderate to high |
| Rain | Wet attic spots, cracked sealant, flashing issues | Active leaks and rot | High |
Bottom line: if the coating is broken, screws are loose, flashing is bent, or water is already getting inside, I don’t wait. Small metal-roof damage can turn into a leak fast - especially after strong wind or the next rain.
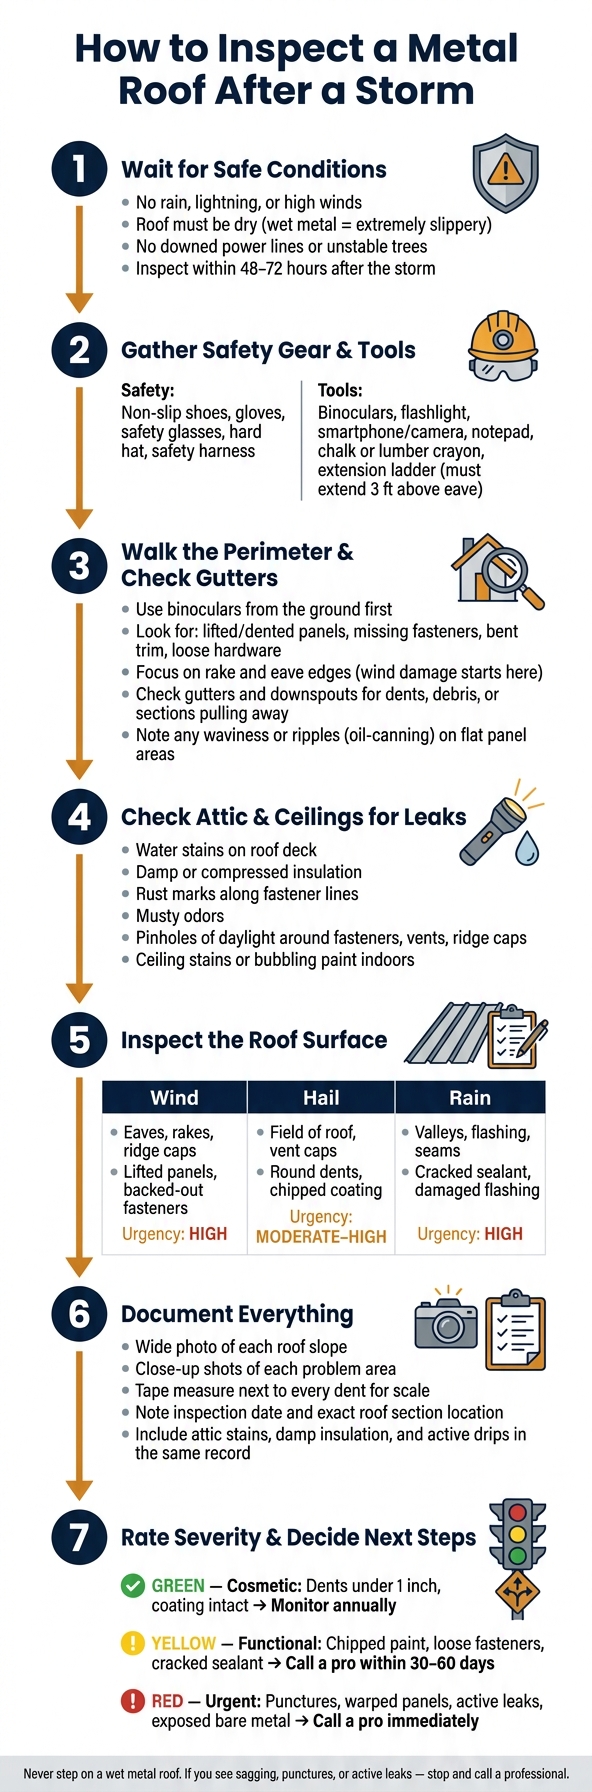
How to Inspect a Metal Roof After a Storm: Step-by-Step Guide
How to Prepare Before You Inspect
Before you inspect a metal roof for storm damage, give it a minute. Wait until the storm is over, the roof is dry, and the area is free of downed power lines, unstable trees, and loose debris. Skip the inspection during rain, high winds, or lightning. And never step onto a wet metal roof - it’s extremely slippery.
Try to complete the inspection within 48–72 hours after the storm. That window can help protect your insurance claim and lets you spot follow-up damage before it gets worse. Small dents, lifted seams, and loose fasteners can be easy to overlook if you’re not prepared. So before you get anywhere near the roof, make sure the site is safe and your gear is ready. Start from the ground, then move closer only if conditions allow.
Safety Gear and Ladder Setup
Wear:
- Non-slip rubber-soled shoes
- Heavy-duty gloves
- Safety glasses
- A hard hat
- A safety harness if roof access is needed
Use a sturdy extension ladder with stabilizers, and make sure it extends at least 3 feet above the eave. Secure the base and tie it off at the top. If you notice sagging sections or visible deformation, stay off the roof and call a professional. No inspection is worth a fall.
Once access is set, get your photo and note-taking tools together before you start the ground-level check.
Tools and Documentation Supplies
Use binoculars first to scan the roof from the ground before climbing. Bring a smartphone or digital camera for timestamped photos, a flashlight to check the attic, and a notepad or notes app to log what you find by roof section. If you spot hail hits, mark them with chalk or a lumber crayon before taking photos. That makes the damage easier to track later.
| Tool Category | What to Bring | Why It Matters |
|---|---|---|
| Safety | Non-slip shoes, gloves, safety glasses, hard hat, safety harness | Reduce injury risk during roof access |
| Access | Extension ladder with stabilizers | Safe reach to the eave |
| Visual | Binoculars, flashlight | Spot damage from the ground or in the attic |
| Documentation | Smartphone/camera, notepad | Build a photo and section-by-section record for insurance and repairs |
| Marking | Chalk or lumber crayon | Flag hail impacts for photos |
With your tools ready, you can move on to the perimeter walk and the interior check.
sbb-itb-e33e3b1
Inspect From the Ground and Inside the Home
With your gear ready, start from the ground and then head inside. Those two checks can spot damage before you ever leave the ladder. Just as important, they let you catch storm damage early without taking a bad fall.
Walk the Perimeter and Check the Gutters
Use binoculars and a flashlight to inspect the roof before stepping onto it. Walk slowly around the whole house and look at the seams, edges, fasteners, and penetrations from a few angles. You want to spot lifted or dented panels, missing fasteners, bent trim, and loose hardware.
Pay extra attention to the rake and eave edges, since wind damage often starts there first. Also check aluminum vent caps and chimney caps. Aluminum dents easily, so those parts can show hail impact fast.
While you're there, inspect the gutters and downspouts for dents, debris, or sections pulling away from the fascia. Wind and hail often leave marks there too. Look across the flat panel areas for waviness or ripples. Oil-canning can point to storm stress or panel misalignment.
Check Ceilings and the Attic for Leaks
Inside the house, look for places where wind or water slipped past the roof surface. The attic is often the best place to check, because water can get in through a small opening and travel along framing before it shows up as a stain somewhere else.
Bring a strong flashlight and check for water stains on the roof deck, damp or compressed insulation, rust marks along fastener lines, and musty odors. During daylight, turn off the flashlight and look for pinholes of light around fasteners, vents, ridge caps, and wall transitions. Any light means there's a breach. Most leaks form at seams, penetrations, and fastener points, not through the middle of a panel.
If you find active drips or decking that looks rotted, stop there and call a professional. Also check ceilings and nearby walls for stains or bubbling paint. Those signs often help you trace where the leak got in. If these checks show damage, move on to a close roof-surface inspection.
Inspect the Roof Surface for Wind, Hail, and Rain Damage
After the ground and attic checks, move to the roof surface to confirm the damage. Only inspect the roof in dry, calm weather, and use fall protection. If the roof is visibly sagging, stop at ladder height and call a professional.
Use a Consistent Inspection Pattern
Work section by section so you don't miss anything. It also helps to inspect from a low angle in the morning or later in the day, when light can make small dents and surface warping easier to spot.
Check Panels, Seams, Fasteners, and Flashing
On each panel, look for lifted edges, visible creases, or metal that sits higher than it should. At the seams, check for separation, gaps, or unzipping, especially on standing seam roofs.
If you have an exposed-fastener roof, inspect for backed-out screws, missing fasteners, or screws that have pulled through the metal. Also check the washers. If they're cracked or missing, you've got an immediate leak risk. In hot areas like Southern California, day-to-night temperature swings can slowly loosen fasteners over time.
At every penetration - chimneys, skylights, and vents - check the flashing for bends, tears, or lifted edges. Then look at the sealant around overlaps and penetrations for cracks or gaps caused by UV exposure, thermal movement, or impact.
How Wind, Hail, and Rain Damage Differ on Metal Roofs
Different storms leave different clues. Wind damage usually shows up first along the edges - eaves, rakes, and ridge caps - where uplift can get under panels and trim. Hail damage often appears as round dents or scuffs across the main roof surface and on softer parts like aluminum vent caps. Larger hail, especially golf ball-sized hail or bigger, can cause punctures and structural compromise.
Some hail dents are only cosmetic if they don't leak. But chipped coatings are a bigger deal. Once bare metal is exposed, corrosion can move faster and cut into the roof's service life long before the usual 40- to 70-year lifespan. Take clear photos of any dents, and include a coin or ruler for scale.
Rain damage tends to show up through exterior trouble spots like clogged valleys, cracked sealant, and damaged flashing around penetrations.
Use the patterns below to match what you're seeing on the roof.
| Damage Type | Common Locations | Visual Indicators | Cosmetic or Functional | Urgency |
|---|---|---|---|---|
| Wind | Eaves, rakes, ridge caps | Lifted panels, missing trim, backed-out fasteners | Functional - affects wind resistance and leaks | High |
| Hail | Field of roof, vent caps, valleys | Round dents, chipped coatings, cracked sealant | Both - can lead to corrosion over time | Moderate to High |
| Rain | Valleys, flashing, penetrations, seams | Clogged valleys, cracked sealant, damaged flashing | Functional - leak-related | High |
Document Damage, Rate Severity, and Decide What to Do Next
Create a Simple Damage Record
Turn your roof check into a record you can actually use for repairs or an insurance claim. After you finish the surface inspection, write down each issue by roof slope and exact location, and include the inspection date, such as 07/27/2026. Start with a wide photo of each roof slope, then take close-up shots of each problem area. Put a tape measure next to every dent so the size is clear in the photo. Add any attic or ceiling stains, damp insulation, or active drips to the same record.
Rate Damage Severity
Once your notes and photos are in one place, sort each issue by severity. Some marks are mostly cosmetic. Others point to leak risk or metal failure.
Dents under 1 inch, scuffs, and chips that do not break the coating are usually cosmetic. Chipped paint, loose fasteners, and cracked sealant can point to functional damage that needs attention.
| Observed Condition | Risk | Next Step | Professional Needed? |
|---|---|---|---|
| Surface dents <1", coating intact | Cosmetic only; loss of curb appeal | Monitor annually | Homeowner review only |
| Chipped paint, loose fasteners | Accelerated corrosion; minor leaks | Call a pro within 30–60 days | Yes |
| Punctures, warped panels, active leaks | Structural damage; mold; interior rot | Call a pro immediately | Yes |
Conclusion: Steps to Take After a Storm Inspection
After the inspection, keep the process simple: start from the ground, check the attic or ceilings for signs of leaks, inspect the roof surface only when it is dry, and document everything with photos and written notes. Move fast on anything tied to leaks or structural damage; those problems do not get better with time.
Use your record to decide if the roof needs monitoring, repair, or immediate help from a pro. If you find active leaks, exposed bare metal, distorted panels, or damage around gutters or other roof penetrations, call a professional. CAP Metal Build serves homeowners across the San Gabriel Valley, CA, with metal roofing and gutter services.
FAQs
Can I inspect a metal roof myself after a storm?
Yes - if it’s safe.
Start from the ground with binoculars and look for obvious dents, missing fasteners, or damaged flashing. Then check your attic or ceiling for water stains.
Don’t climb onto the roof if it’s wet, steep, or if you don’t have the right safety gear. If you’re not sure what you’re seeing, or you think the damage may be serious, contact a professional like CAP Metal Build.
What storm damage on a metal roof needs immediate repair?
Any storm damage that affects your roof’s ability to stay watertight needs to be fixed right away. That includes:
- punctures
- buckled or bent panels
- damaged seams or flashing
- loose or missing fasteners
- chipped or cracked protective coating that leaves bare metal exposed
If you spot interior leaks or any sign that the structure may be unstable, contact a specialist right away to help stop more damage.
Will small dents on a metal roof cause leaks later?
Not always. A lot of small dents are just cosmetic and don’t automatically lead to leaks.
What matters most is where the dent is and how bad it is. If the protective coating is still intact and the dent only affects the panel surface, the roof usually performs the same as before. Leak risk goes up when the coating is broken or when the dent warps key areas like seams, trim, fasteners, or side laps.