How Metal Roof Coatings Prevent Rust
Rust starts when water and oxygen reach bare steel. A roof coating helps stop that contact. If your metal roof is still sound, the right coating system can slow corrosion, seal weak spots, and add 15 to 20 years of roof life without the cost of full replacement.
Here’s the short version:
- Rust spreads fast at seams, screws, cut edges, and penetrations
- Coatings work by blocking water and air
- Primers matter just as much as topcoats on steel roofs
- Silicone, acrylic, and polyurethane each fit different roof conditions
- Prep is where many coating jobs fail
- If panels have pinholes or rust-through, coating is not enough
If I had to sum it up in one line, it would be this: a coating does not fix bad metal, but it can protect good metal from turning bad.
A few points stand out from the article:
- In coastal Southern California, salt air can wear down metal roof protection fast
- On a 100-foot roof run, thermal movement can reach 3 to 5 inches
- Field-cut steel edges may start rusting in 3 to 5 years if left untreated
- Bare or standard galvanized steel near the coast can show red rust in 5 to 10 years
| What matters most | What to know |
|---|---|
| Main rust trigger | Water + oxygen on exposed steel |
| First failure points | Seams, fasteners, flashing, penetrations, cut edges |
| Best time to coat | When rust is light and panels are still sound |
| When not to coat | When panels are perforated or soft |
| Main job of primer | Protect steel and help the topcoat bond |
| Main job of maintenance | Catch cracks, peeling, and failed fasteners early |
So if you’re trying to keep a metal roof from corroding, the path is simple: inspect it, clean it, prime it, reinforce the weak spots, and keep the coating in shape.
What Causes Rust on Metal Roofs
Rust forms when steel is exposed to moisture and oxygen. That reaction creates iron oxide, a flaky reddish-brown layer that can hold water against the metal and make the problem worse. Once you know where rust begins, the next job is keeping moisture and oxygen away from the steel.
How Moisture, Air, Salt, and Sun Speed Up Corrosion
Moisture, salt, UV, and heat all speed up rust.
In coastal Southern California, salt air is a big problem. Chlorides wear down protective layers and make trapped moisture more corrosive. Standard galvanized or bare carbon steel within one mile of the coast can show visible red rust within 5 to 10 years.
Sun adds another layer of wear. Strong UV exposure breaks down paint finishes over time, which can lead to chalking, fading, and tiny cracks that let salt and moisture get to the metal below. On top of that, metal panels expand and contract as temperatures change. Over a 100-foot roof length, that movement can reach 3 to 5 inches.
How Steel, Galvanized Steel, Galvalume, and Aluminum Differ
Not all metal roofs have the same rust risk. Some metals need coating systems to do much more heavy lifting than others.
| Metal Type | Rust Risk | How It's Protected |
|---|---|---|
| Carbon Steel | High | No inherent rust protection |
| Galvanized Steel | Yes, once zinc wears away | Sacrificial zinc layer |
| Galvalume Steel | Yes, if the coating fails | 55% aluminum, 43.4% zinc, 1.6% silicon alloy |
| Aluminum | No | Self-forming aluminum oxide film |
Galvalume offers roughly 2x the corrosion resistance of standard galvanized steel in outdoor exposure tests. Aluminum, copper, and zinc don't rust the way steel does because they contain no iron.
That difference matters more than it may seem. A coating that works well on aluminum isn't doing the same job on carbon steel. The roof metal underneath sets the rules.
Where Rust Usually Starts on a Metal Roof
Rust usually starts at weak points where the protective coating is thinnest, damaged, or gone.
The most common trouble spots include:
- Panel overlaps and seams
- Exposed screw heads
- Flashing edges
- Roof penetrations like HVAC curbs or pipe boots
- Field-cut panel edges at the eave or ridge
Field-cut edges are one of the biggest problem areas because cutting removes the factory coating and leaves raw steel exposed. If those edges aren't treated with a zinc-rich primer, they can start showing rust within three to five years of installation.
Fasteners are another common failure point. As the roof expands and contracts with temperature swings, screws can slowly back out. That weakens the seal and gives water a direct path into the hole. Blistered, chipped, or worn coating can do the same thing by exposing bare steel.
Rust usually starts at seams, fasteners, cut edges, flashing, and penetrations - any place where the coating is thin, damaged, or missing. That's why coatings, primers, and sealants matter most at those weak points.
sbb-itb-e33e3b1
How Metal Roof Coatings Prevent Rust
Coatings help stop rust by sealing out water, blocking oxygen, and strengthening the places that tend to fail first. That’s the core job. If moisture and oxygen can’t reach the metal, rust has a much harder time getting started.
There are three main ways coatings do this: they block moisture and oxygen from reaching the metal, they protect steel with primers, and they reinforce seams, fasteners, and other weak spots. On steel roofs, that protective layer works best when there’s a primer underneath.
Barrier Coatings That Block Water and Oxygen
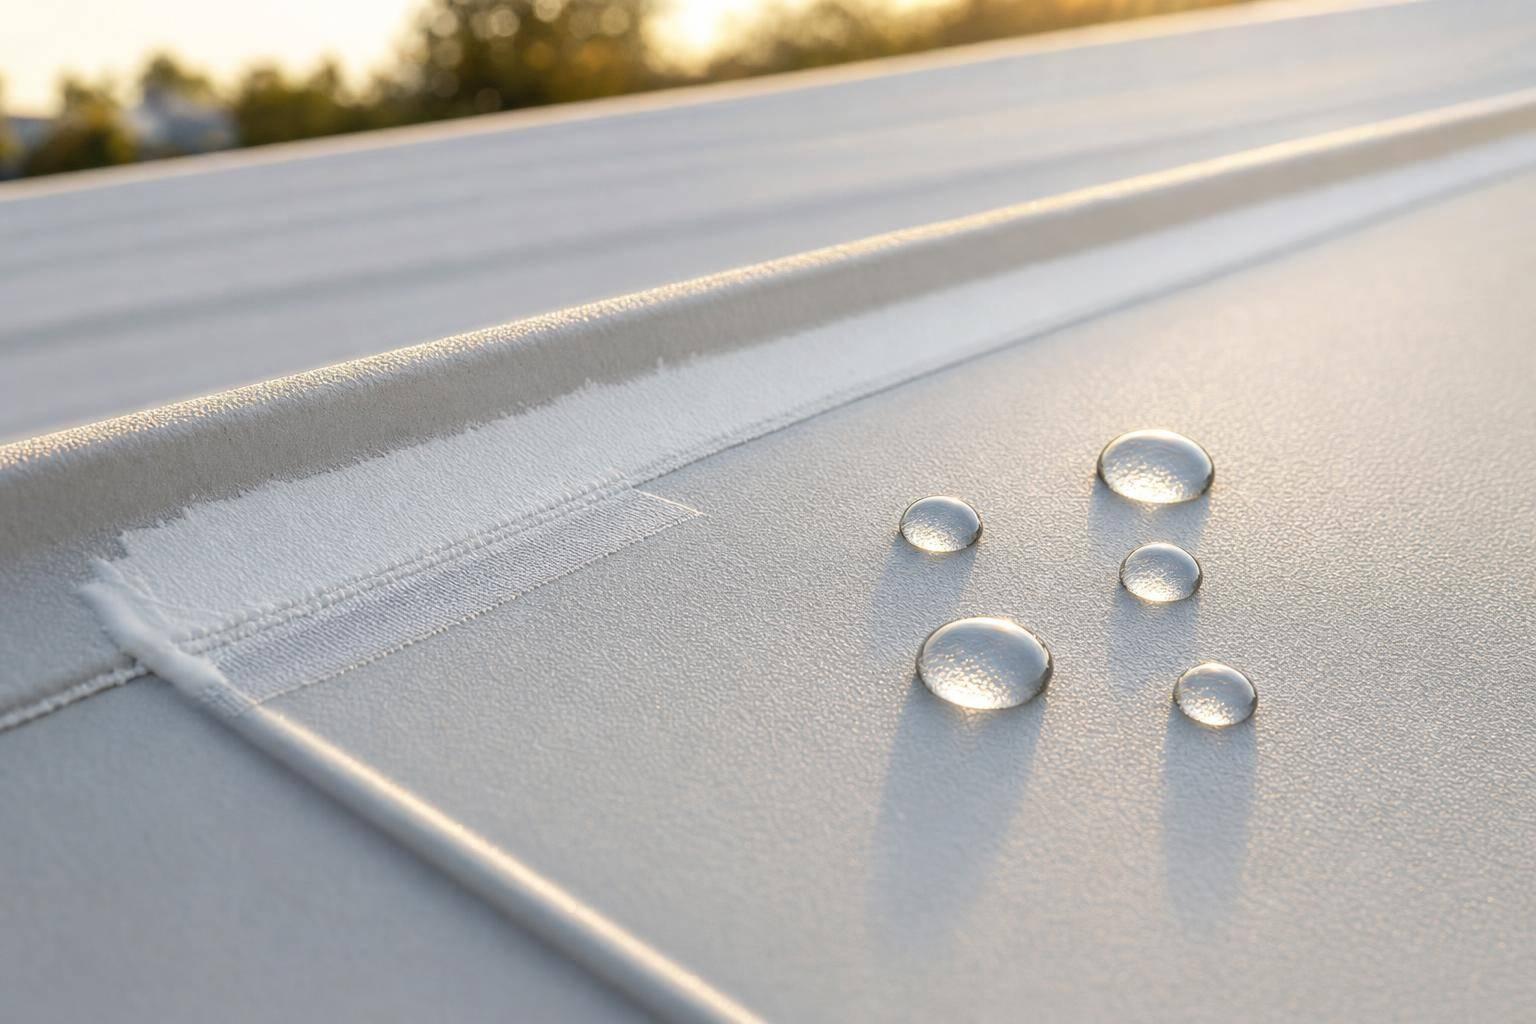
Acrylic, silicone, and polyurethane coatings create a physical layer between the metal substrate and the two main causes of corrosion: moisture and oxygen. Think of that layer like a rain jacket for the roof. If it stays intact, the metal underneath has far less exposure.
Roof panels don’t stay still, though. As temperatures change, they expand and contract. That movement matters. A rigid coating can crack over time, and once cracks show up, water has a way in. Flexible coatings move with the roof, so they’re less likely to split open.
Reflective coatings help in another way too. By cutting heat stress, they slow the wear that can cause the coating to break down.
Primers That Protect Steel by Slowing or Stopping Rust
Steel roofs need a primer under the topcoat. The right primer depends on the roof material and its current condition.
On some steel roofs, zinc-rich or zinc-based primers add another layer of defense. The zinc corrodes first and protects the steel beneath, which helps cover small nicks or scratches in the coating.
If the roof has light surface rust, rust-inhibitive primers can help slow that rust so the topcoat can be applied over it.
There’s one compatibility issue you can’t ignore: never use alkyd-based coatings on Galvalume or galvanized steel, because the chemistry can break adhesion.
Why Seams, Fasteners, and Penetrations Need Extra Attention
These are the trouble spots. They need reinforcement, not just a layer of coating. Movement at joints and fastener failure can open small paths for moisture, so the main field coating by itself isn’t enough here.
For seams, the reliable method is a three-layer setup:
- a base layer of coating
- a reinforcing strip of polyester or fiberglass mesh
- a top layer of coating over that
This forms a flexible bridge across the joint, which helps it move without cracking.
Fastener heads need their own treatment. Loose screws should be re-driven or replaced, failed EPDM washers should be swapped out, and each fastener head should be sealed with a flashing-grade sealant before the field-applied coating goes on.
How to Choose and Apply a Rust-Preventive Coating
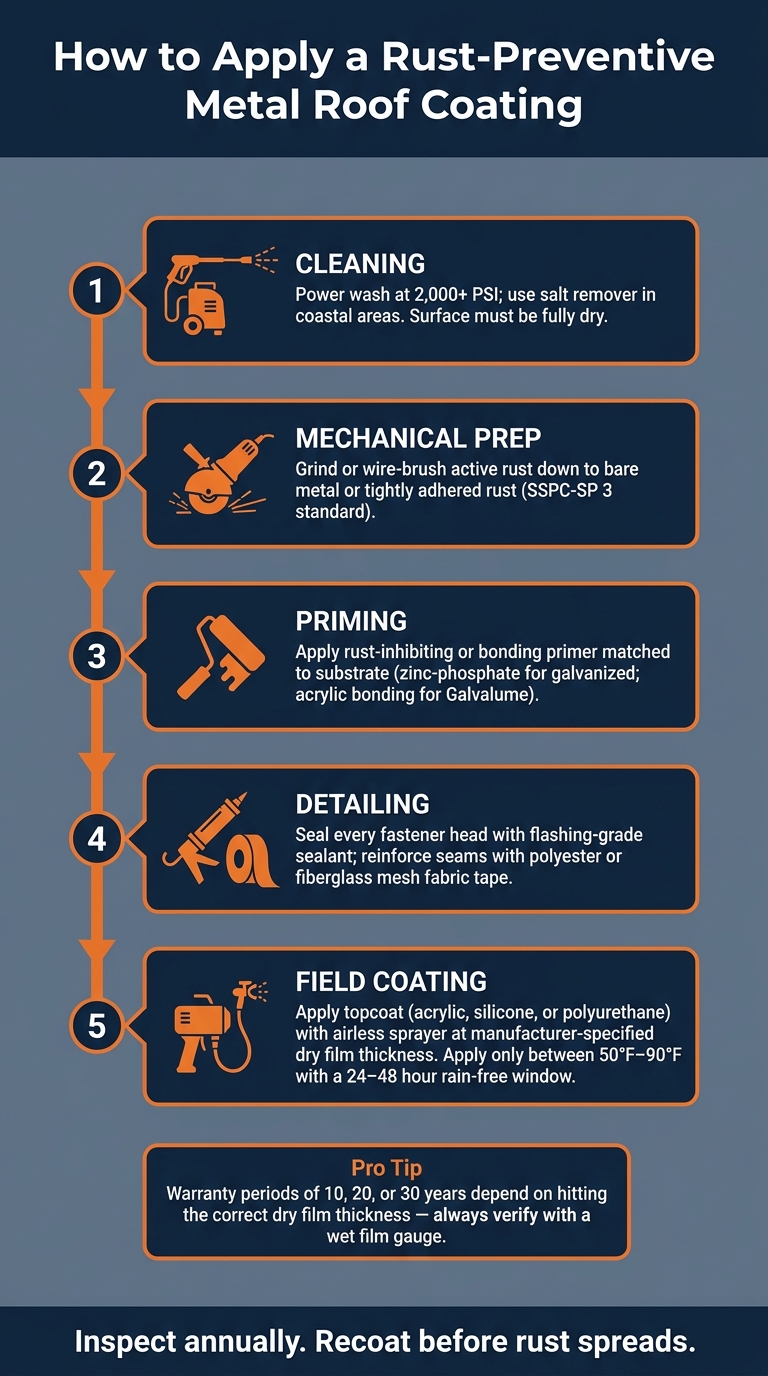
How to Apply a Rust-Preventive Metal Roof Coating: Step-by-Step
Choose the Right Coating and Primer for Your Roof and Climate
Once you've sealed the roof's weak spots, the next job is choosing a coating that fits both the roof and the weather it deals with. That means looking at the roof's slope, the chance of ponding water, foot traffic, and how much sun it takes day after day.
| Coating Type | UV Resistance | Flexibility | Ponding Water | Best Use Case |
|---|---|---|---|---|
| Acrylic | High | Up to 500% elongation | Low | Steep-slope standing seam |
| Silicone | Excellent | Flexible from -65°F to 300°F | Excellent | Low-slope roofs or standing water |
| Polyurethane | Very High | High, impact-resistant | Moderate | High-traffic or industrial roofs |
| Aluminum-Pigmented | Moderate | Low | Low | Agricultural or corrugated metal |
In high-UV climates, the right pick depends on the roof's slope, heat load, and how much the metal expands and contracts.
Primer matters too. Galvanized steel usually calls for a zinc-phosphate primer. Galvalume usually needs an acrylic bonding primer.
After you've picked the coating system, surface prep becomes the make-or-break step for bond and service life.
How to Prepare the Roof Surface Before Coating
Surface contamination is the most common reason coatings fail.
Start with a close inspection. Look for backed-out fasteners, separated seams, and debris sitting in valleys or gutters. If you can spot pinholes of light from the attic on a sunny day, the panel is rusted through and should be replaced instead of coated.
New galvanized steel or Galvalume panels may need light sanding or chemical etching if the factory finish feels slick or oily. Then power-wash the roof to strip away dirt, chalk, oxidation, and biological growth. Near the coast, use a salt remover too, because pressure washing by itself won't remove all corrosive salts.
Active rust needs mechanical cleaning. Use a grinder with a wire cup brush or a 40-grit flap disc to clean the surface down to firm, tightly adhered rust or bare metal under SSPC-SP 3 standards.
| Rust Stage | What You See | What to Do |
|---|---|---|
| Stage 1: Surface | Orange/brown staining; surface feels smooth | Mechanical cleaning, rust-inhibiting primer, and coating |
| Stage 2: Pitting | Rough, cratered texture; visible depressions | Aggressive mechanical prep, rust converter, and reinforced membrane |
| Stage 3: Through-Panel | Visible pinholes, perforations, or soft spots | Full panel replacement; coating will not bridge these gaps |
Apply coatings only when temperatures are between 50°F and 90°F, winds are low, and the forecast gives you a 24- to 48-hour rain-free window. The roof surface must be fully dry before any primer or coating is applied.
With the roof clean and dry, the next step is priming, sealing roof details, and building the field coat.
How to Apply Primer, Seal Details, and Build Coating Thickness
Seams and fasteners usually fail before the metal panels do. That's why the application sequence matters so much.
Follow this order: clean and remove loose rust, prime the prepared surface, seal seams and fasteners, and then apply the field coat. If rust is still present after cleaning, apply a rust converter first, then primer.
After the primer cures, seal every fastener head and reinforce key seams with fabric-embedded silicone or butyl tape before adding the topcoat. For the field coat, use an airless sprayer. Brushes and rollers are best for detail work.
| Step | Task | Tools/Materials | Conditions |
|---|---|---|---|
| 1 | Cleaning | Power washer (2,000+ PSI), salt remover | Dry surface; no rain forecast |
| 2 | Mechanical Prep | Grinder, wire brush, or 40-grit flap disc | Remove loose rust and scale |
| 3 | Priming | Rust-inhibiting or bonding primer | Match primer to substrate |
| 4 | Detailing | Sealant for fastener heads; fabric tape for seams | Before field coat |
| 5 | Field Coating | Airless sprayer, roller, or brush | 50°F–90°F; 24–48 hours rain-free |
Use the manufacturer's specified dry film thickness. Warranty periods of 10, 20, or 30 years are tied to that number.
How to Maintain the Coating and Plan the Next Inspection
Once the coating is in place, the job isn’t over. Regular inspections help catch small coating issues before they expose bare metal. That matters because problems like chalking, peeling, blistering, and hairline cracks can turn into rust if they sit too long.
What to Check Once or Twice a Year
Inspect the roof once or twice a year, then check it again after hail or windstorms. Start by clearing leaves and debris from valleys and gutters. Wet organic material can trap moisture against the metal and speed up corrosion.
After that, inspect the coating up close. Look for chalking, peeling, blistering, or hairline cracks, especially around HVAC units, pipes, skylights, vents, and other penetrations.
Pay close attention to:
- Fasteners that have backed out
- Hardened EPDM washers
- Lifted screw heads that can let water in
- Seams and panel laps that have started to separate
- Hail dents or other surface damage that may have chipped the coating
If you spot damage, handle the repair right away before rust has a chance to spread.
When Spot Repairs Work and When Full Recoating Makes More Sense
Spot repairs make sense for isolated damage, like a few backed-out fasteners, one small rust spot, or a failed sealant bead. In those cases, clean the area, apply a rust-inhibiting primer, and finish with a topcoat touch-up.
If the wear shows up across large sections of the roof, recoating usually makes more sense than patching one problem after another.
It also helps to log each repair. That way, the next inspection can flag repeat trouble spots much faster.
Keep Roof Records and Call a Metal Roofing Specialist When Needed
After every inspection or repair, record the date, the product names used, and photos of the work. Those notes help you see how the coating is aging, support future warranty claims, and make wear patterns easier to track as you plan repairs later on - whether the roof is Galvalume or galvanized steel.
San Gabriel Valley homeowners can contact CAP Metal Build for an inspection, corrosion check, and maintenance plan before small failures spread.
FAQs
Can a roof coating stop rust that has already started?
Yes - if the rust is only on the surface and the roof is still structurally sound.
The key is prep. Before you apply the topcoat, the rust needs to be treated the right way, usually with a rust-inhibiting primer or rust converter.
Once that’s done, the coating helps seal out moisture and oxygen, which can slow or stop more rust from forming.
But there’s a line you can’t paint over. If the rust has led to pinholing or structural failure, the damaged metal needs to be replaced, not coated.
Which coating works best for my metal roof?
The right coating comes down to what you want most: rust protection, heat control, or looks.
If the roof already has active rust, start with a rust-inhibiting primer. That gives the next coat a better surface to grip and helps protect the roof over time.
Here’s the short version:
- Elastomeric acrylics work well on standing seam and corrugated steel
- Silicone holds up well against moisture and extreme temperatures
- Polyurethane enamels make a good topcoat when color retention and UV resistance matter most
CAP Metal Build says surface preparation matters more than anything else. That’s the part you don’t want to rush.
How do I know if my roof should be coated or replaced?
A professional inspection is the best way to make the call.
In most cases, replacement makes more sense when the roof is no longer structurally sound, the metal panels have rusted through, or more than 25% of the panels or insulation show heavy wear.
Other warning signs matter too. Persistent leaks, poor flashing or trim details, and heavy corrosion that weakens the metal can all signal that repair work may not be enough.
CAP Metal Build can assess your roof’s condition and recommend the best path forward.