
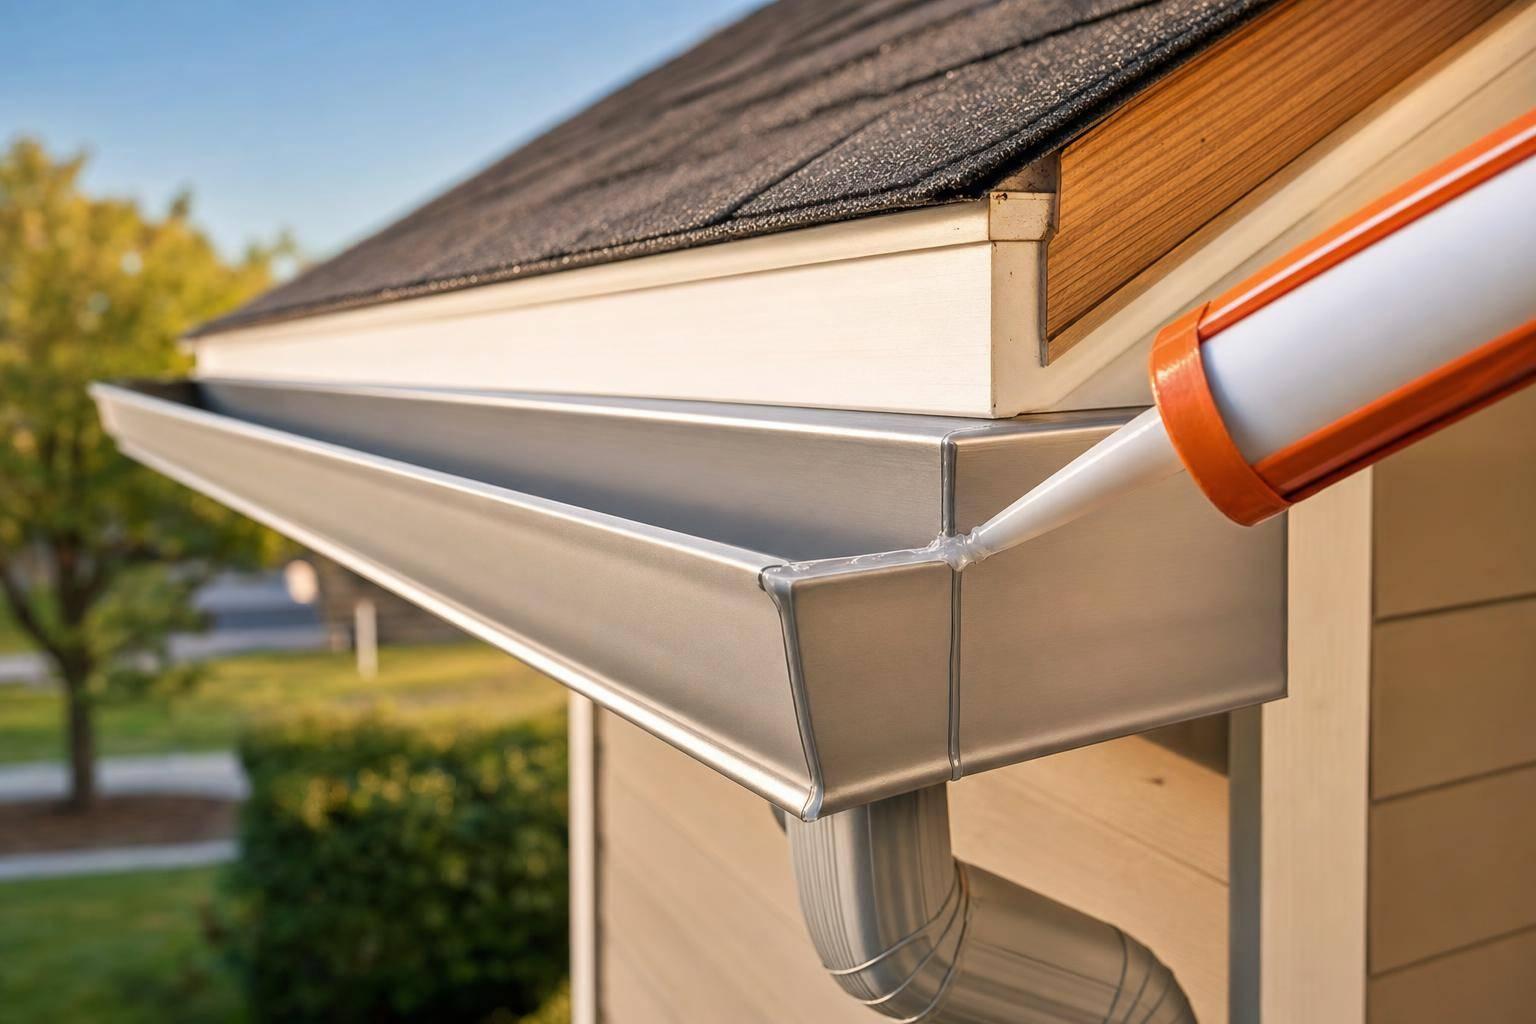
How to Fix Leaking Gutters Before They Cause Damage
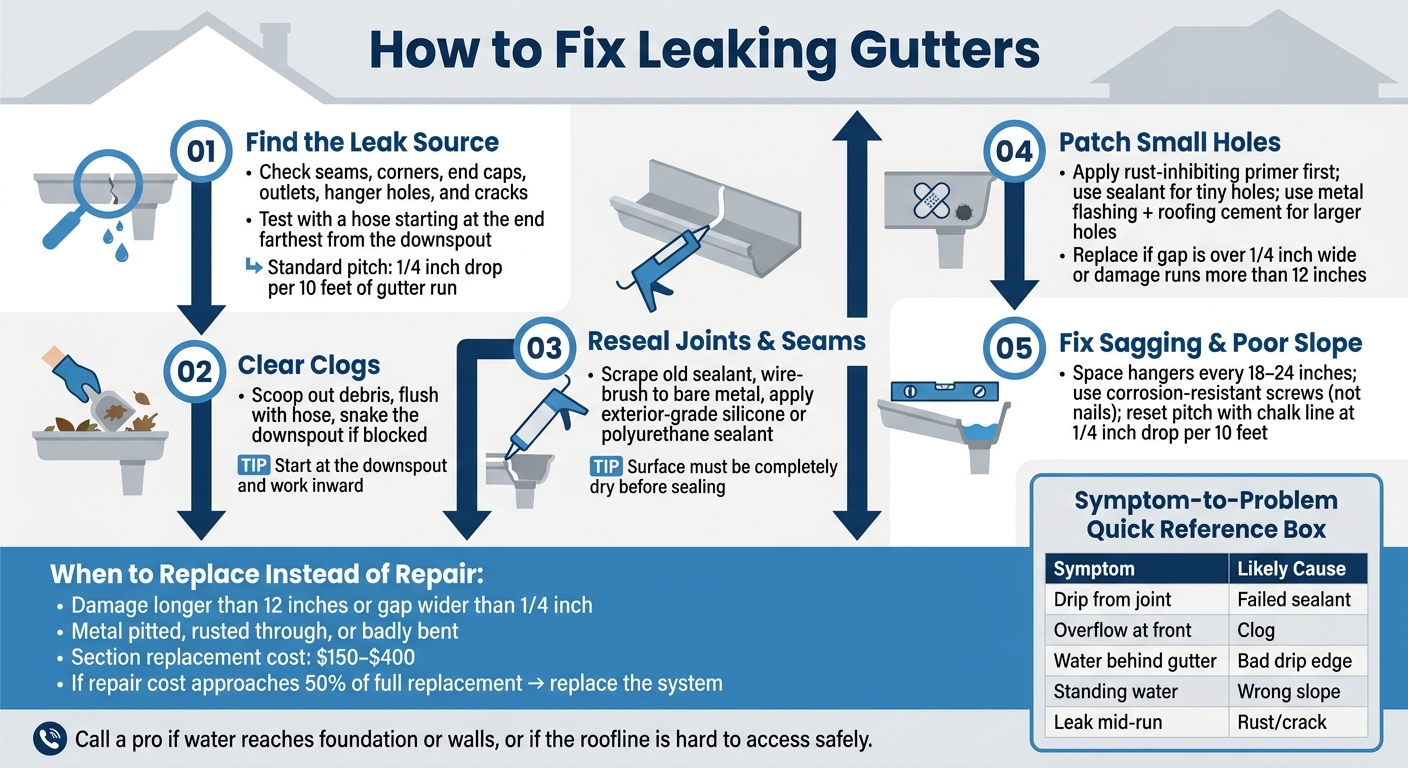
A small gutter leak can turn into wood rot, siding stains, and water near your home’s base fast. I’d fix it in this order: find the exact leak, clear clogs, reseal joints, patch small holes, and then correct sagging or bad slope if water still sits or spills.
Here’s the short version:
- Check the usual leak spots: seams, corners, end caps, outlets, hanger holes, and cracks
- Test with a hose: start at the end farthest from the downspout and watch where water escapes first
- Look for overflow signs: mildew, peeling paint, stained fascia, and washed-out soil
- Clean before sealing: sealant won’t hold well over dirt, old caulk, or wet metal
- Reset pitch if needed: aim for 1/4 inch of drop per 10 feet
- Replace parts when damage is too large: if a gap is over 1/4 inch or damage runs more than 12 inches, patching may not last
- Expect repair vs. replacement tradeoffs: a section swap often costs about $150 to $400
If I saw water dripping from a joint, I’d suspect failed sealant. If water spilled over the front, I’d check for a clog first. And if water ran behind the gutter, I’d look at the drip edge, fascia, or a section pulling loose from the house.
Bottom line: most gutter leaks start small and can be fixed with cleaning, sealant, a patch, or new hangers before they lead to bigger repair bills.
How to Fix Leaking Gutters: Step-by-Step Repair Guide
Find the Source of the Leak
Start by finding the leak exactly. If you put sealant in the wrong place, it usually won’t hold for long. Bring a ladder, garden hose, level, tape measure, and a helper who can steady the ladder and keep an eye out for leaks.
Set the ladder on firm, level ground. Use a stabilizer so the ladder rests on the roof instead of the gutter.
Inspect During Rain and in Dry Weather
Rain makes the problem easier to spot. Watch where water drips from a joint, slips behind the gutter, or spills over the front edge. Each one points to a different problem. When it’s dry, look for rust spots, mildew streaks, peeling paint, and stains on the fascia or siding. Also check the ground below the eaves. If the soil looks washed out, that often means the gutter has been overflowing for a while.
While you’re on the ladder, gently press on the seams with a finger. This can show whether they’re loose or if the sealant is failing. If the fascia feels soft or looks stained, the leak may have reached the wood. Those clues help you narrow down the repair before you start cleaning or resealing.
Test Flow With a Hose and Check Slope
Run water through the gutter, starting at the end farthest from the downspout. Then watch for the first place where water escapes. That’s usually your leak. If water backs up and spills over the edge, a clog is the usual cause.
After the hose test, check whether water stays in the gutter after you turn the water off. Standing water means the slope is off. The standard pitch is 1/4 inch of drop for every 10 feet of gutter run. Use a level and tape measure to check it. A flat gutter, or one that pitches backward, lets water sit in place and wears out sealant faster.
Match the Symptom to the Problem
Match what you saw to the most likely cause:
| Symptom | Likely Problem |
|---|---|
| Water dripping from a joint or corner | Failed sealant or separated seam |
| Water spilling over the front edge | Clog in the gutter or downspout |
| Water running behind the gutter | Improper drip edge or gutter pulling away from fascia |
| Standing water in the gutter | Incorrect slope or sagging section |
| Water escaping from the middle of a run | Pinholes from rust or physical cracks |
Take photos of each problem area before you start the repair. Those "before" shots make it easier to check your work later, and they give you something to compare if the leak shows up again.
sbb-itb-e33e3b1
Clear Clogs and Fix Simple Leaks
If the leak is coming from an overflow, a loose seam, or a small hole, start with the easiest fix first.
Remove Debris and Unclog Downspouts
Before you grab sealant, clean out the gutter all the way. Use a gutter scoop or garden trowel for wet, packed sludge and shingle grit. A handheld leaf blower is handy for dry leaves, but it won’t budge heavy debris. Start at the downspout and work inward. Drop the debris into a bucket, then flush the gutter with a hose.
If water still backs up at the downspout, try a strong blast from the hose first. If that doesn’t do it, feed a plumber’s snake from the bottom up. That helps avoid pushing the clog farther in. If needed, disconnect the lower elbow to clear it out. When you reattach it, use short aluminum pan-head screws. Long screws can snag debris and set you up for another clog.
If the gutter still leaks after cleaning, the next step is to reseal the joints.
Reseal Seams, End Caps, and Joints
Sealant works for small joint leaks, loose corners, end caps, and downspout connections when the gutter itself is still in good shape. The prep does most of the work here.
Scrape off all old sealant with a putty knife. Then scrub the area with a stainless steel wire brush until you get down to bare metal, removing rust or peeling paint as you go. Rinse the area and let it dry all the way. Sealant won’t stick to a wet surface. Apply a thin, continuous bead of exterior-grade silicone or polyurethane sealant along the inside of the joint, then smooth it with your finger. If a hanger is loose or the gutter section is sagging, fix that first. Any movement can crack the new sealant fast.
If water is leaking through the metal itself, patch that spot next.
Patch Small Holes and Cracks
Small repairs like nail holes, isolated pinholes, or short cracks can usually be patched if the rest of the metal is still solid. Start the same way you would with a seam repair: wire-brush the area to bare metal, apply a rust-inhibiting primer, and let it dry.
For tiny holes, exterior-grade silicone or polyurethane sealant is usually enough. For anything bigger, press a piece of metal flashing or a commercial gutter patch kit into roofing cement or gutter repair cement. Then flatten the edges so water flows past instead of catching on them. Make sure the patch overlaps so the upstream piece sits on top. That way, water runs over the joint instead of sneaking underneath it. After the repair cures, run a hose through the gutter to make sure it holds before you take down the ladder.
Widespread rust, brittle metal, or leaks that keep coming back usually mean the section needs to be replaced. If the same leak returns again and again, patching won’t do the job.
Fix Sagging Gutters, Loose Hangers, and Poor Pitch
If cleaning and resealing didn't stop the leak, the next thing to check is the gutter's support and slope. A sagging gutter or bad pitch can push water behind the gutter instead of through it. And when that happens, water can end up near the roofline, siding, fascia, and foundation.
Tighten or Replace Hangers and Brackets
Walk along the gutter and look for sections pulling away from the fascia, dipping between supports, or sitting lower than the rest. In most cases, loose, bent, or missing hangers are the problem. Hangers should be spaced every 18 to 24 inches to help prevent sagging from water and debris.
Use corrosion-resistant exterior screws when you make repairs. Nails tend to back out over time. Before you drive in any fastener, press a screwdriver into the fascia. If the wood feels soft or spongy, the fastener won't hold well. Replace hangers, brackets, or spikes and ferrules as needed.
Reset the Gutter Slope Toward the Downspout
Clean the gutter first, then run a hose from the end farthest from the downspout. If water sits in the gutter instead of flowing out, the slope is off and needs to be reset. A good target is about 1/4 inch of drop for every 10 feet.
Mark the new pitch with a chalk line on the fascia. Start higher at the end farthest from the downspout, then angle the line down toward the outlet. Loosen the hangers in the low section, lift the gutter trough until it lines up with the chalk line, and fasten it again at the new height. After that, run the hose one more time to make sure water flows cleanly to the downspout.
When to Replace the Fascia or a Gutter Section
If the gutter keeps pulling away or the metal is in bad shape, it's time to stop patching and replace the failed part.
A soft or rotted fascia won't hold gutter fasteners. Replace any soft, split, or rotted fascia before rehanging the gutter.
If a gutter section is twisted, crushed, warped, or heavily corroded, replacement is usually the better move.
Replace Damaged Sections or Call a Professional
If cleaning, resealing, and hardware repairs still don't fix the leak, it's time to decide whether the gutter is still worth saving. At some point, patching stops making sense. When repairs keep failing, replacement is usually the better move.
A section replacement is the right call when the damage is more than 12 inches long, runs across a structural joint, or leaves an opening wider than 1/4 inch. At that size, sealant can't bridge the gap in a way you can count on. The same applies when the metal is badly pitted, rusted through in more than one spot, or bent so far out of shape that it won't sit or drain the way it should. If you're patching pinhole after pinhole or sealing joint after joint, the gutter system is likely at the end of its life.
Once the damage goes past a simple fix, compare the repair cost with replacement. A section replacement usually runs $150 to $400. And if repair costs get close to half the price of a full replacement, replacing the system is the smarter choice.
Some issues also move beyond DIY territory. Call a professional if:
- Water is already getting into the foundation or walls
- Gutters keep pulling away from the house
- The roofline is hard to reach
- The drainage layout is complex
Conclusion: Fix Small Leaks Early to Avoid Bigger Repairs
A leaking gutter usually starts small. You might notice a drip at a seam, a soft spot on the fascia, or water spilling where it shouldn't. Taking care of those leaks early helps protect the siding, fascia, foundation, and landscaping. Fix small leaks before they turn into section failure and damage along the roofline and foundation.
FAQs
How do I know if my gutter leak is from a clog or a bad seam?
Clean the gutter and flush it with a hose. If the water moves through like it should and the leak stops, it was probably a clog. A clog often leads to overflow or backup, which can look like a leak at first glance.
If the gutter still leaks after you clean it, the problem is probably a bad seam. A drip from the same joint in every storm, or water streaks down the outside, usually means the seam has pulled apart or the sealant has failed.
What type of sealant should I use for leaking gutters?
Use an exterior-grade, waterproof sealant that's made for outdoor use. Silicone-based and polyurethane-based sealants are the top picks here because they stay flexible as temperatures swing and stand up well to rain, sun, and day-to-day wear.
Before you apply anything, clean the area well and remove old sealant, dirt, and loose debris. Then run a generous bead along the joint or crack and smooth it out with a putty knife or a gloved finger so it forms a watertight bond.
When should I repair a gutter instead of replacing a section?
Repair a gutter when the damage is limited to one area and the rest of the system is still in good shape. It also makes sense when the gutters aren’t that old - usually less than 15 to 20 years old - and the repair costs less than 30% to 50% of a full replacement.
In most cases, a repair is enough for one-off issues like:
- a leaking seam or end cap
- loose gutter sections
- minor clogs
- small corrosion holes
- gutters attached to a fascia board that’s still in good condition
If the problem is small and the main structure is holding up, a repair is often the smarter move.