Ultimate Guide to Metal Roof Waterproofing
Most metal roof leaks start at seams, screws, flashing, and roof penetrations - not the metal panels themselves. If I want a metal roof to last, I need to inspect those spots, fix loose fasteners, replace failed sealant, treat rust, and use the right tape, sealant, or coating for the job.
Here’s the short version:
- Metal panels may last 40 to 60 years
- Sealants at joints often last only 10 to 20 years
- Loose or failed fasteners cause about 60% of metal roof leaks
- In hot parts of Southern California, roof surfaces can reach 160°F to 212°F
- Small leak points can turn into rot, rust, and deck damage if I ignore them
What I need to focus on:
- Inspect first, especially from the attic and around leak-prone areas
- Fix the source, not just the water stain
- Replace backed-out screws instead of only tightening them
-
Use the right product for each repair:
- Butyl tape for hidden joints
- Polyurethane for exposed flashing repairs
- Silicone for sun-heavy penetrations
- Coat the full roof only after repairs and surface prep are done
- Check the roof twice a year and after storms
If the roof has recurring leaks, spreading rust, sagging, or damage across a large section, patching may no longer be enough. At that point, I’d stop doing spot fixes and get a metal roofing pro involved.
This guide breaks down what to inspect, what to repair, what materials to use, and how to keep a metal roof dry for the long haul.
How to Inspect Common Leak Points on a Metal Roof
Use the warning signs above to narrow down where to look. Inspect first. If you seal the wrong spot, you can hide the leak instead of fixing it.
Only inspect when the roof is completely dry. Wet metal is slick and dangerous. Near Los Angeles, morning dew can stick around until mid-morning, so wait until the surface is fully dry before you go up.
Start inside the house. Walk through the attic with a bright flashlight and check for water trails on rafters, wet insulation, or daylight coming through the roof deck. Water often travels along ribs, purlins, or rafters before it drips, which means the ceiling stain below usually does not line up with the actual entry point. Mark the spots that look suspicious from the inside, then take photos of each defect for repair planning or records.
Once you've marked the likely leak paths indoors, check those same areas on the roof. Over time, thermal movement, wind, and repeated temperature swings can loosen fasteners and pull seams apart.
Fasteners, Washers, and Panel Seams
Check fasteners first. They're one of the most common places leaks start. Look for:
- Screws that have backed out
- Rust streaks below the screw head
- Neoprene washers that are cracked, flattened, or missing
Panel seams deserve a close look too. Check for lifted panel overlaps, where the edge of one panel has pulled away from the one below it, and for gaps in the sealant along overlapping edges. A 20-foot steel panel can move close to 1/4 inch between temperature extremes. That steady expansion and contraction wears down sealant over time, especially on older roofs.
If you find a backed-out screw, don't just tighten it again. The hole is often enlarged, so the better fix is to replace it with a screw that has a slightly larger diameter.
Flashing, Roof Penetrations, and Rust Damage
Flashing and penetrations are common trouble spots. Check every place where something passes through the roof or meets it, including pipe boots, chimney bases, skylight curbs, plumbing vents, ridge caps, valleys, and wall transitions. Run your finger along the sealant bead at each location and look for cracks or open gaps.
With rust, you need to figure out whether it's just on the surface or if it has started eating into the metal. Light surface rust can usually be cleaned and coated. Deep corrosion, pinholes, thinning metal, or flaking areas need patching or replacement before any waterproofing work starts.
Use a wire brush to remove loose rust or old sealant so you can see the condition of the metal underneath.
Southern California Conditions That Affect Metal Roof Waterproofing
Southern California heat and UV can wear these weak points out faster. In the San Gabriel Valley and the greater Los Angeles area, roof surface temperatures can hit 160°F to 212°F during intense summer heat. That kind of heat can crack sealant, wear out washers, and loosen fasteners sooner than many homeowners expect.
Debris is another issue. It can build up in valleys and gutters, hold moisture against the metal, and speed up corrosion. Check gutters and downspouts during the same inspection. Clogged gutters can force water under the panel edges at the eaves. Clean them out before starting any waterproofing work.
sbb-itb-e33e3b1
How to Choose the Right Sealants, Tapes, and Coatings
Choose the product that fits the repair. If a sealant or coating doesn't match the job, it can fail early or even harm the finish. The simple rule is this: match the product to the failure point.
Also, sealants and coatings are backup protection, not a cure for loose fasteners, open seams, failed flashing, or active rust. Fix those issues first. Then seal.
Sealants and Seam Tapes for Joints and Penetrations
For spot repairs, you'll usually be looking at butyl tape, polyurethane sealant, or silicone sealant. Each one has its lane.
Butyl tape is a double-sided synthetic rubber tape used between metal surfaces. You'll find it inside panel laps, under pipe boots, and along z-closures before they're fastened down. It stays flexible and doesn't shrink much during installation. But here's the catch: it should stay hidden beneath another part because UV light breaks it down. Never use butyl tape as an exposed topical sealant.
Polyurethane works well for exposed repairs like flashing joints, sidewall transitions, and headwalls. It bonds well to metal, stays flexible enough for thermal movement, and can be painted after it cures.
Silicone handles UV exposure very well, so it's a strong fit for pipe boots and other penetrations that get a lot of sun. But it can't be painted.
"No sealant should ever be applied to the outside of a seam. But when external sealant applications are unavoidable, do not use silicone." - Rob Haddock, Metal Roof Advisory Group, Ltd.
| Product Type | Typical Use | UV Resistance | Flexibility | Paintable | Best Locations |
|---|---|---|---|---|---|
| Butyl Tape | Panel laps, under pipe boots | Low | High | No | Hidden joints, panel overlaps |
| Polyurethane | Flashing joints, exposed repairs | Moderate | High | Yes | Sidewalls, headwalls, flashing |
| Silicone | Pipe boots, high-UV penetrations | Excellent | High | No | High-UV areas, penetrations |
One more thing that often gets missed: check the movement rating on any gun-grade sealant. Class 50 is preferred for metal roofs because panels move a lot as temperatures change. A Class 35 product may crack at the joints over time.
Use tapes and sealants for small, targeted repairs. When the waterproofing issue spreads across a bigger section of roof, coatings start to make more sense.
Roof Coatings for Full-Roof Waterproofing
If the problem goes past a few seams or fasteners, or the roof is simply getting older and you want more years out of it, a full-roof coating may be the better path. These elastomeric systems are sprayed or rolled across the roof to form one continuous waterproof film.
Acrylic elastomeric coatings are common on sloped metal roofs and in cool-roofing retrofits. They cost less and reflect sunlight well. The tradeoff is that they don't do well with standing water and usually need recoating sooner than silicone or polyurethane systems.
Silicone coatings cost more up front, but they perform very well under harsh UV and handle ponding water without breaking down. That makes them a strong choice for low-slope sections.
Polyurethane coatings are tougher under foot traffic, so they fit roofs that see regular maintenance traffic or industrial use.
| Coating Type | Ideal Use Case | Ponding Water Resistance | Maintenance | Service Life |
|---|---|---|---|---|
| Acrylic Elastomeric | Sloped roofs, cool-roofing retrofits | Low | Moderate | 5–15 years |
| Silicone | Flat/low-slope, high UV exposure | Excellent | Low | 10–20 years |
| Polyurethane | High-traffic or industrial roofs | High | Moderate | 10–20 years |
Primers, Surface Prep Products, and Cool-Roof Options
Even the right product can fail on the wrong surface. Dirt, oils, chalk, oxidation, and rust all get in the way of adhesion.
Before applying anything, clean the metal well. Remove red rust mechanically. Prime white rust with a rust-inhibiting primer. If painted panels are only lightly oxidized, use a chemical cleaner or degreaser first, then mechanical abrasion if needed so the new material has a sound surface to grip.
Watch the manufacturer's cure window closely. Many sealants cure in about 48 hours at 75°F, but that same product can take up to 5 days at 40°F. If you apply a coating outside the recommended temperature range, or before the primer has fully cured, adhesion can fail.
For hot, sun-exposed roofs, use a reflective coating that meets local reflectance rules. A cooler roof surface also cuts thermal stress on sealants and fastener washers, which helps the waterproofing system last longer. It's also smart to check with your local building department. Some areas have Title 24 energy code rules that set minimum solar reflectance values for re-roofing projects.
After the product is chosen, surface prep and application order determine whether it bonds.
Step-by-Step Metal Roof Waterproofing Process
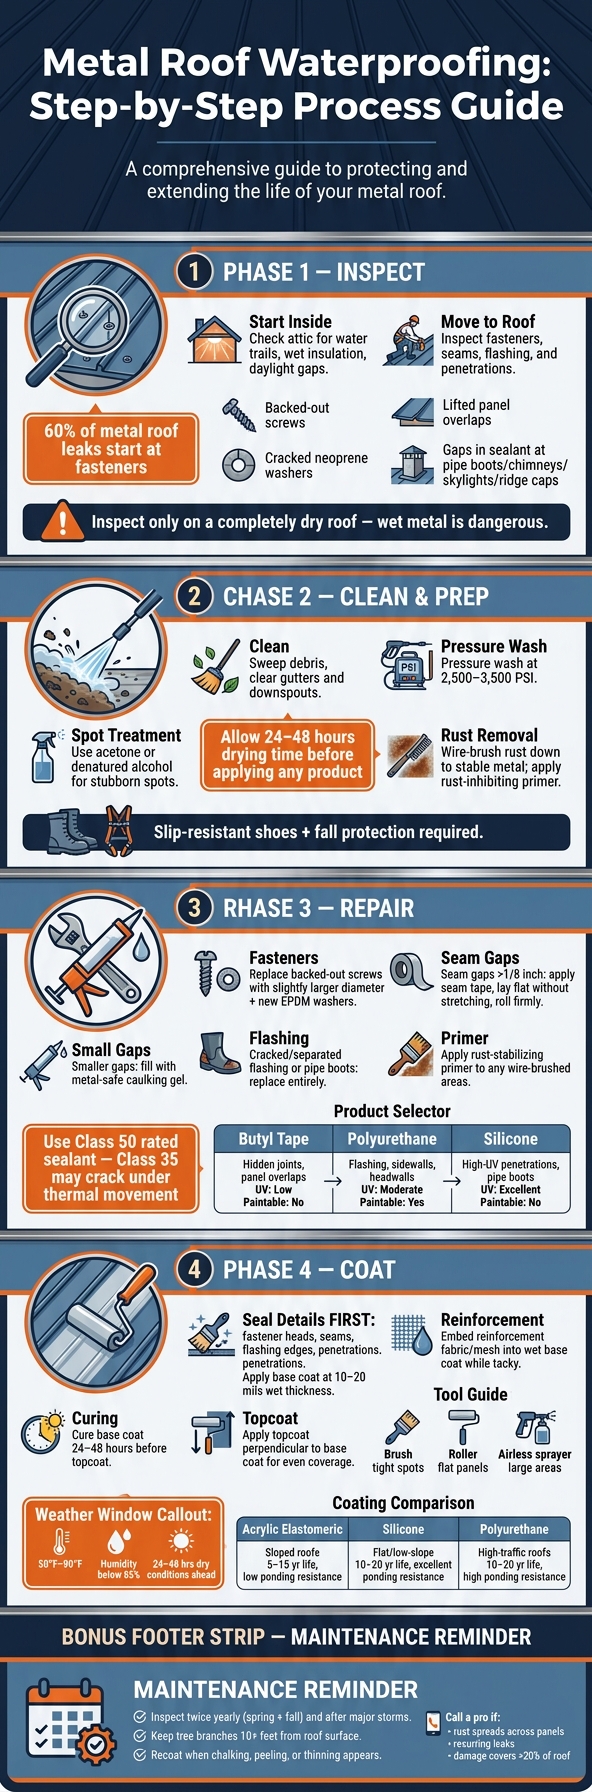
Metal Roof Waterproofing: Step-by-Step Process Guide
Once you've picked the right products, application order matters just as much as product choice. Rush the job or skip a step, and the repair may not last as long as you hoped. The sequence is straightforward: inspect the marked problem areas, clean the roof, make the repairs, and then apply the coating.
Clean the Roof and Prepare the Surface
Start by sweeping off loose debris and clearing gutters and downspouts so water can drain during and after the job. Then wash the roof at 2,500–3,500 PSI to remove dirt, chalking, and loose oxidation. For stubborn spots, use acetone or denatured alcohol.
After washing, let the roof dry all the way through for at least 24–48 hours before applying anything. A roof can look dry and still hold moisture in seams and laps, so don't go by sight alone.
If you find rust, wire-brush it down to stable metal and apply primer. If the corrosion is severe, stop there and deal with that issue first.
Safety matters here too. Wear slip-resistant shoes, use fall protection, and stay off wet metal.
Once the roof is clean and fully dry, move on to the trouble spots you marked during inspection.
Repair Fasteners, Seams, Flashing, and Rusted Areas
With the surface clean and dry, work through each failure point from the inspection. Replace loose or backed-out screws with a slightly larger diameter fastener and new neoprene or EPDM washers. Simply tightening the old screw usually doesn't help, because the original hole is often stripped. And if one fastener has failed, check the whole run since wind uplift often causes failures in groups.
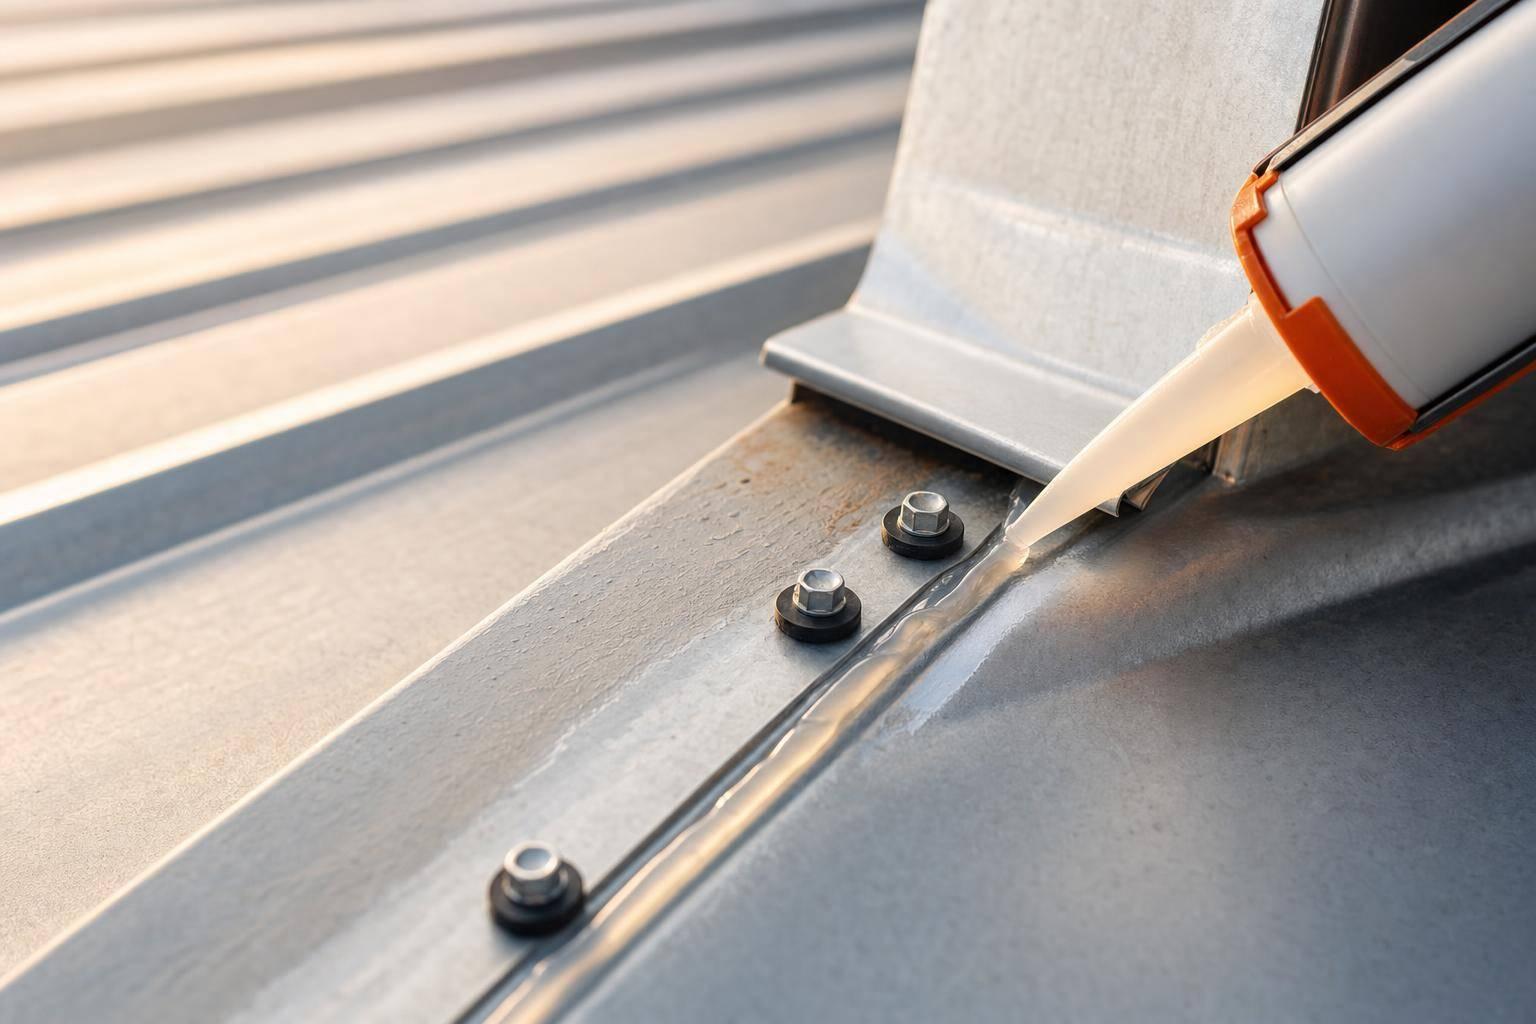
For seam gaps wider than 1/8 inch, apply seam tape, lay it in place without stretching it, and roll it down firmly. Smaller gaps can be filled with a metal-safe caulking gel, then smoothed with a brush or putty knife.
If flashing or pipe boots are cracked or separated, replace them instead of patching over old sealant. Any area you wire-brushed should also get a rust-stabilizing primer.
Severe issues - distorted panels, damaged underlayment, or structural rust - need to be fixed before any coating is applied.
Once the repairs have cured, seal the detail areas before coating the full roof surface.
Apply Waterproof Coatings in the Right Order
Start with the detail work, then coat the field areas. That means sealing every high-risk point first, including fastener heads, seams, flashing edges, and penetrations, before moving across the full roof.
At seams and joints, embed reinforcement fabric or mesh into the wet base coat while it's still tacky. Apply the base coat at the manufacturer's stated thickness, usually 10–20 mils wet, and let it cure for 24–48 hours before adding the topcoat.
Use the right tool for each part of the job:
- Use a brush for tight spots
- Use a roller for flat panels
- Use an airless sprayer for large areas
Apply the topcoat perpendicular to the base coat so coverage stays even. Follow the manufacturer's coverage rate and thickness rules exactly.
For weather, apply coatings between 50°F and 90°F, with humidity below 85%, and make sure you have 24–48 hours of dry conditions ahead. Starting early in the day helps the coating cure before evening dew sets in.
After the coating cures, the next step is annual inspection and touch-up maintenance.
Maintenance, Recoating, and When to Call a Metal Roofing Professional
A Yearly Maintenance Plan for Metal Roof Waterproofing
Once the coating cures, the job shifts from repair to upkeep. The goal is simple: catch small issues before they turn into leaks.
Start with the same trouble spots you already fixed - fasteners, seams, flashing, and penetrations. Check the roof at least twice a year, usually in spring and fall. Then inspect it again after major storms, high winds, or hail. Keep tree branches at least 10 feet away from the roof surface to cut down on scratching and organic buildup. If a wildfire leaves ash or soot behind, clean it off as soon as you can to help slow wear.
Here’s a simple schedule to stay ahead of problems:
| Inspection Frequency | Maintenance Task | Warning Signs |
|---|---|---|
| Semiannual (Spring/Fall) | Inspect fasteners and washers | Backed-out screws, cracked EPDM gaskets, rust around heads |
| Semiannual (Spring/Fall) | Clean gutters and downspouts | Pooling water at eaves, overflowing gutters, debris piles |
| After Major Storms | Check seams, flashing, and panel alignment | Visible gaps, lifted panel edges, interior water stains |
| Annual | Clear valley debris | Mold or mildew growth, accumulated leaves |
| Annual | Inspect sealant and flashing at all penetrations | Cracked or hardened sealant, gaps at vent boots |
| As Needed | Trim overhanging branches | Scratches on coating, branches touching roof |
| As Needed | Full surface recoat | Chalking, peeling, or thinning |
A roof usually gives you clues before it fails. A backed-out screw here, a cracked gasket there, a little water pooling near the eaves - it doesn’t look like much at first. But leave those signs alone, and they tend to stack up fast.
When Waterproofing Repairs Are No Longer Enough
Spot repairs are great for isolated issues. But there comes a point when patching stops making sense and starts becoming a cycle.
Call a professional when you notice any of the following:
- Red rust spreading across panels - surface rust can often be treated, but widespread corrosion means the metal itself is wearing away
- Recurring leaks in the same spot after repeated repair attempts - that often points to a bigger issue, like failed flashing design or seam separation
- Coating failure across large areas - if you see chalking, peeling, or flaking over broad sections, the protective layer is no longer doing its job
- Visible sagging, soft decking, or widespread interior water damage - signs that water has moved past the roof surface and into the structure
- Damage covering more than 20% of the roof surface - at that point, a larger restoration project or full replacement is often the smarter move
Some details are best left to a pro from the start. Complex flashing around chimneys, skylights, HVAC curbs, and solar mounting hardware can get tricky fast, especially when the leak source isn’t obvious or the roof is still under warranty.
Key Steps for a Dry, Long-Lasting Metal Roof
Regular inspection and fast touch-ups help extend roof life. Inspect, clean, repair, recoat.
FAQs
How do I know if my metal roof needs repair or a full coating?
Choose repair for isolated issues like loose or missing fasteners, small seam separation, or minor punctures.
Go with a full coating only if the roof is still structurally sound and you want preventive protection. If you spot major corrosion, rust with more than 30% metal loss, or structural sagging, fix those structural problems first. A coating by itself won’t repair a roof that’s already failing.
Can I waterproof a metal roof without replacing old screws and sealant?
No. You should not waterproof a metal roof without fixing old screws and failing sealant first.
Most leaks start at loose fasteners, worn rubber washers, and seams that have started to separate. If you spread new sealant over those trouble spots without fixing what’s underneath, the repair usually doesn’t last.
A better fix is simple: remove the old, worn sealant and replace old screws with new ones fitted with fresh EPDM washers.
What sealant works best for seams, flashing, and pipe boots?
Butyl tape is the better pick for concealed, pressurized joints, like overlapping metal panels and the area under pipe boot flanges. It stays flexible and forms a gasket-like seal, which helps it handle thermal movement without giving out.
For exposed spots, such as flashing edges or backup beads around pipe boots, use a UV-resistant gun-grade sealant like polyurethane or tripolymer. If you can, avoid sealing the outside of seams.